Hello, dear friends! In this article I will tell you how to change name on Facebook.
Change the name in this social network is very simple. Let’s take a step-by-step look at how to do it.
Step-by-step instruction, how to change name on Facebook
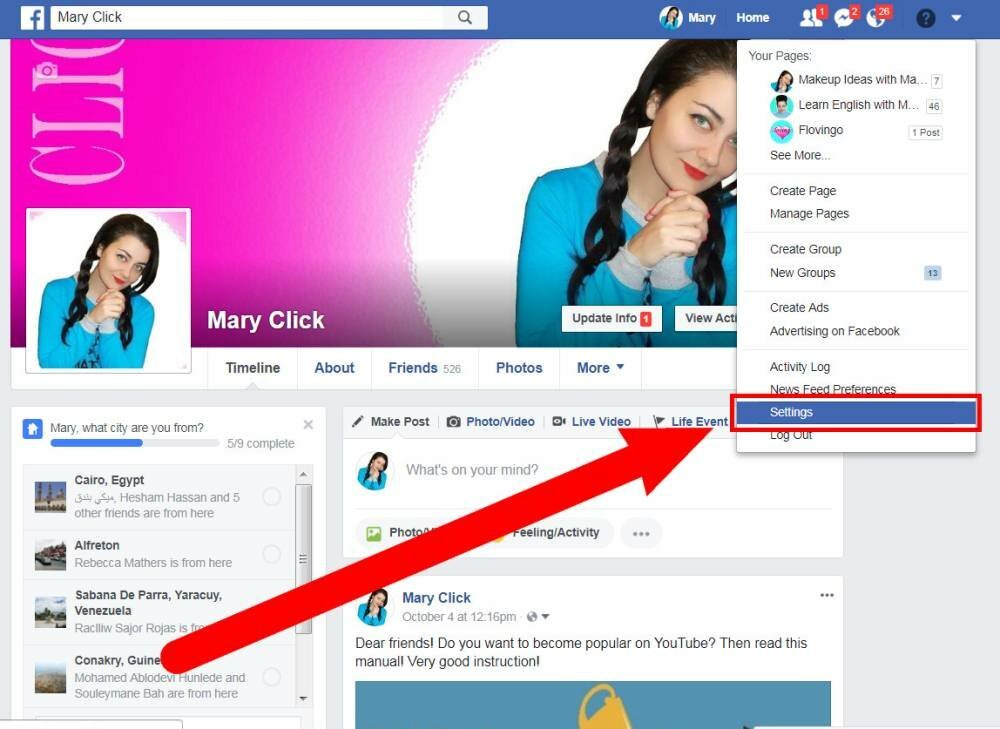
- Go to your Facebook page and in the upper right corner find the profile settings:

- Click on the arrow and select “Settings”:
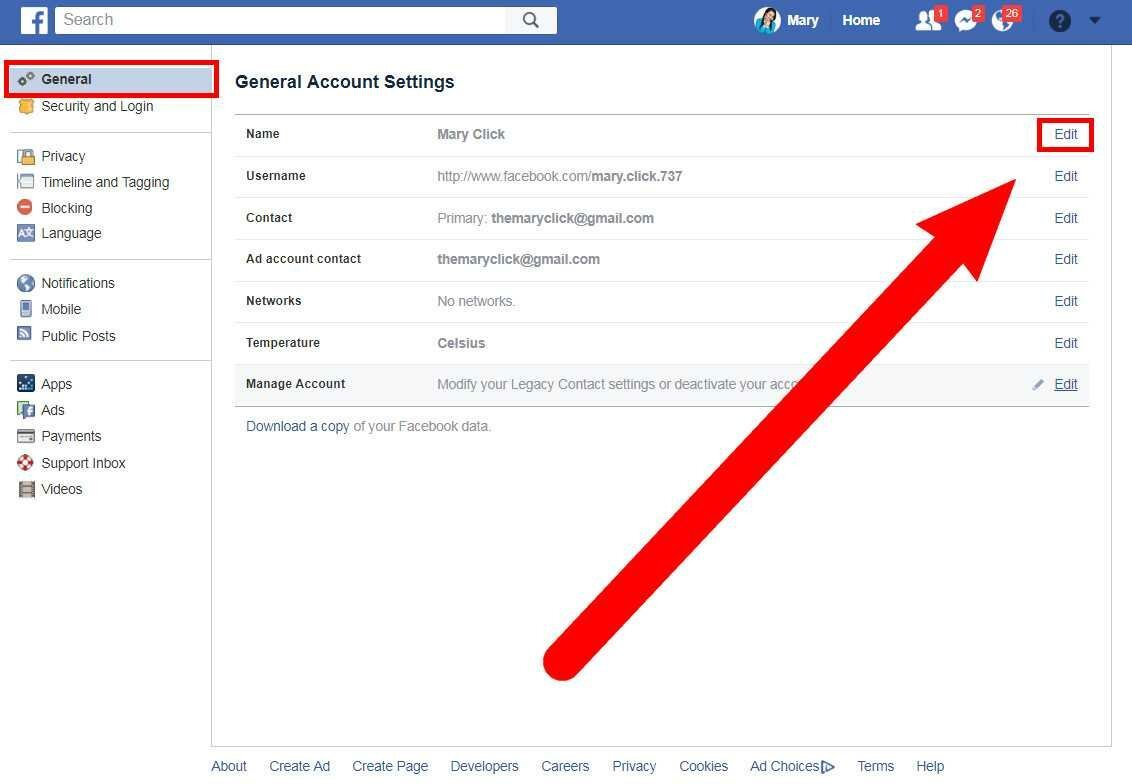
- In the “General” section, click near your name “Edit”:
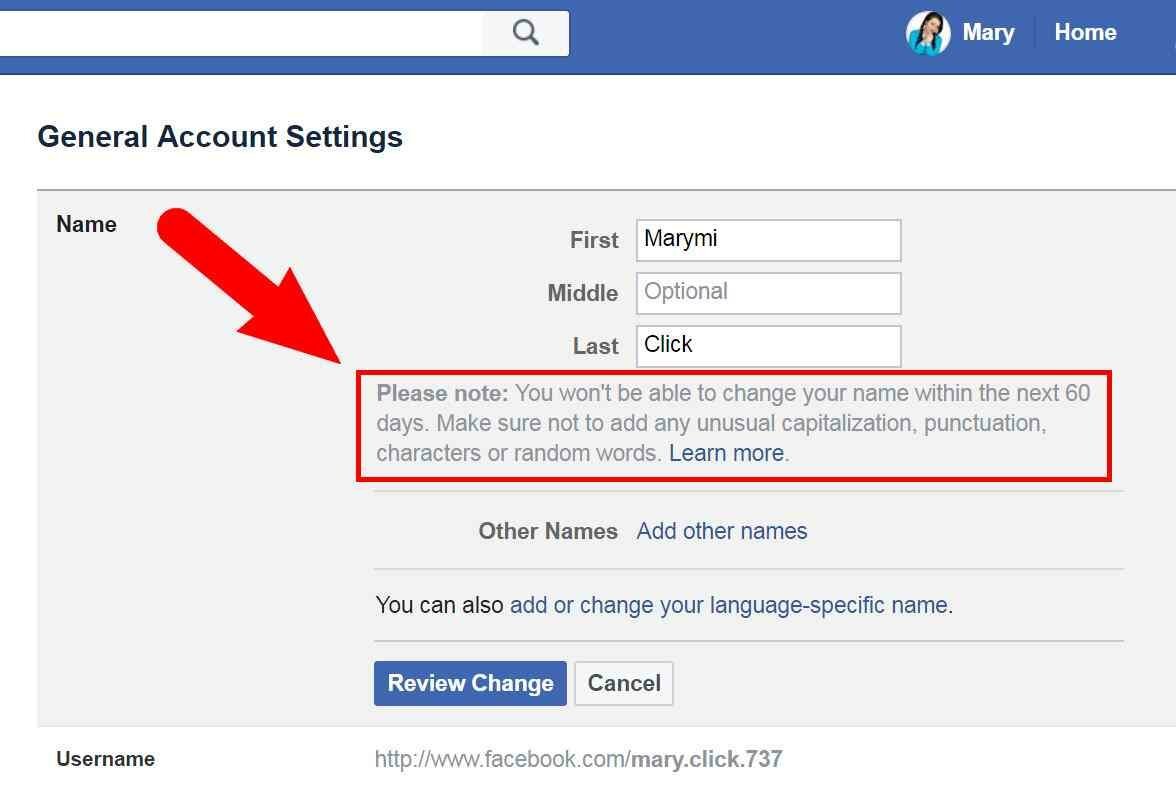
- The fields for editing will be opened.

- Change your name and click “Review Change”:

- A window will open with an inscription: «Choose how your name will appear on your profile». Select the option you want and enter the password from the account. Click “Save Changes”:
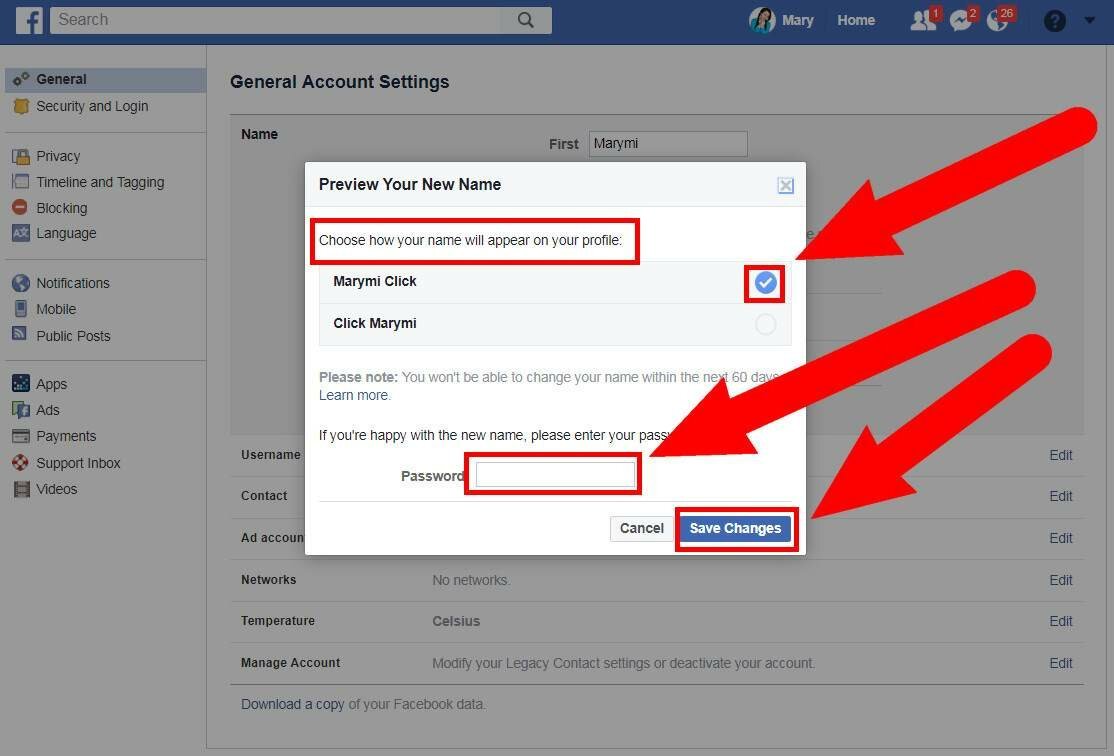
That’s all. According to the rules of Facebook, you can change the name once in 60 days. So, be careful. You do not have several attempts.
Additional options for changing the name on Facebook
In addition to this, there are several more options for changing the name. Where fields for editing a name are opened, you can see additional settings:
- Add other names
- Аdd or change your language-specific name

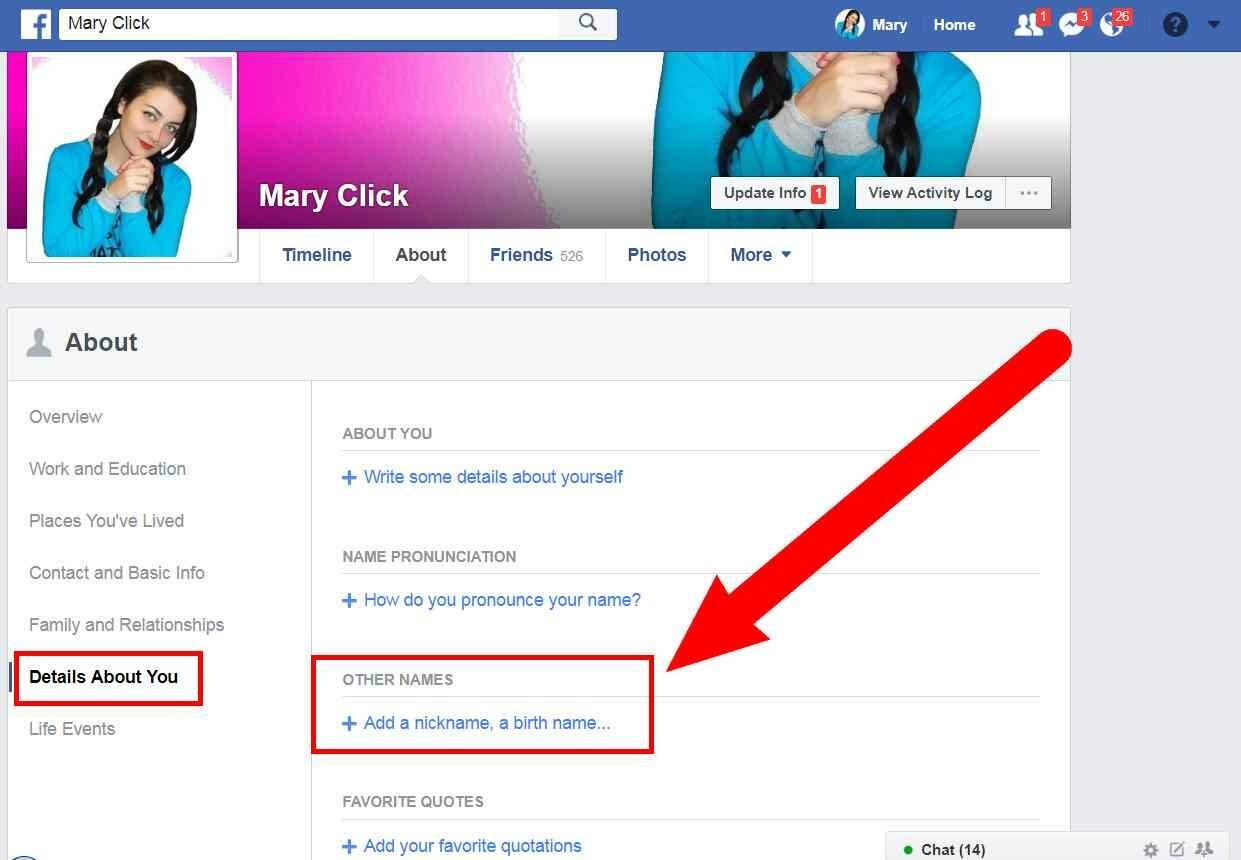
If you click “Add other names”, you will see a page with “Details About You”, where you can add a nickname or a birth name. Thus, without changing your main name, your acquaintances will be able to find you if you are known under a different name:
If you select “Аdd or change your language-specific name” it will allow you to display your name in the original language that people use when viewing your page. Also, if you use the language on which your name is written in the original, your name will also be displayed in its original form.

That’s all. When changing the name, Facebook can request confirmation by phone number. Therefore, to an account on Facebook you must have a connected number, which will always be with you.
Thank you for your attention. I will be happy to see your comments.